Hello! Another fabulous black Friday come and gone....it's been our "family tradition" to dress in black and wear silly hats on black Friday and to go shopping at midnight until dawn. Well, this year my children were not with me so I invited some of my friends to join me in the fun.... This year I was "The Snow Queen of the South", my friend Deidre was Santa's Princess and Maria was Rudolph. We started shopping at 10 pm on Thursday and crashed at Cracker Barrel for breakfast at about 8:30 am the following day. Yes, I went to sleep at about 1 pm on Friday and got up the following morning at 7 am!!!! (That's what happens when you forget you are in your fifties...ha, ha, ha).
This is the Christmas card I designed for The Pink Elephant Challenge. This is one of the fabulous digi stamps from the Puddle Jumper collection designed by Lori Boyd called "Nativity" and you can see more right here.
I used a page of an old Hymn book as my background.
This card is made with the Lollipop Christmas Bundle I digi stamps, also designed by Lori Boyd. I used puffy paint for their hats and Christmas boots.
I made this card using cardboard, burlap and my new leaf punch. It is posted today at http://thepinkelephantchallenge.blogspot.com/
Monday, November 29, 2010
Friday, November 26, 2010
Happy Black Friday!
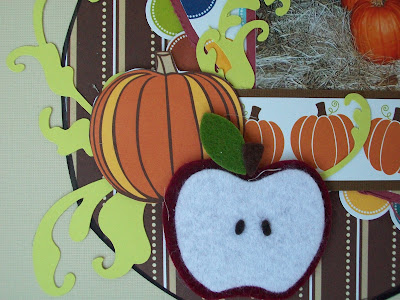
Happy Black Friday! Hope you are enjoying all the fabulous sales everywhere! My friends and I have been "up" since midnight, all dressed in black and wearing silly hats!!!. Yes, pictures will be posted soon....Today is Stuck On Us Sketches challenge. This is my page inspired by Ness sketch.
I used Paper Poppy November Kit to make it.
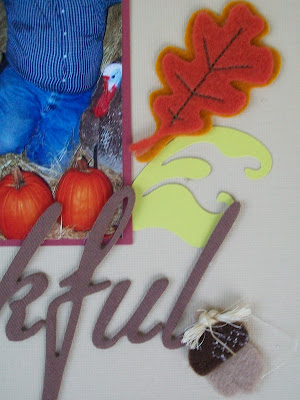
I also used this layout for The Pink Elephant Challenge yesterday. I was inspired by the word "Thankful". I am "very thankful" that my husband has a great sense of humor and no matter what we do or where we go he always enjoy himself.
These embellishments are made out of felt and came in the kit. Love them!!!
Have a blessed and fabulous day!
Thursday, November 25, 2010
Happy Thanksgiving!
Happy Thanksgiving!
Make a joyful noise to the Lord, all the lands!
Serve the Lord with gladness! Come into God's presence with singing!
Know that the Lord is God! It is he that made us, and we are his;
we are his people, and the sheep of his pasture.
Enter his gates with thanksgiving, and his courts with praise!
Give thanks to him, bless his name!
For the Lord is good;
his steadfast love endures for ever,
and his faithfulness to all generations.
Psalm 100
Wednesday, November 24, 2010
Flower Tutorials
Happy Wednesday! Today I want to share with you these flower tutorials. Have fun!
Stitched Ribbon Flower by Beate Johns
Supplies
- Ribbon or lace
- Needle and thread
- Button or brad
-
Step 1
Start running the needle through the edge of the ribbon or lace in big stitches. -
Step 2
Continue to stitch the edge of the ribbon until you arrive at the other end. -
Step 3
Keep the needle on the thread and pull the thread to bunch the ribbon together in a circle. -
Step 4
Line up the two ends of the ribbon on top of each other. -
Step 5
Stitch the two ends of the ribbon together. -
Step 6
Turn flower over so the seam is in the back. Now pull the thread ends again until the flower is a shape you like. -
Step 7
Turn the flower back over and tie the thread in a knot and cut off. -
Step 8
Add a button or brad in the flower center.
No-Sew Fabric Flower by Lil Blue Boo
Glue Gun
Fabric Scraps
Fabric Scraps
To make a flower, first I start by connecting two chenille pipe cleaners together. I've found that two make the perfect size flower:

For each flower you need a 20" x 2" fabric scrap. Start by putting a long bead of Fabri-Tac along the strip:

Starting at one end start rolling the fabric around the pipe cleaner. The key is not to roll to tight or too perfect....just kind of haphazardly roll your fabric up:

If you run out of fabric before you get the pipe cleaners covered just add another piece in as you go:

Once the pipe cleaner is covered with fabric, start at one end and begin rolling the flower into a spiral shape, adding in a small bead of Fabri-Tac every few inches as you go:

You'll develop your own technique for rolling as you go....I have kind of a roll, roll, then twist technique to make mine look a little fuller and shabby:

As you get to the end of your flower, tuck the "tail" under the flower with a dab of Fabri-Tac and use a small clothespin to secure. Let the Fabri-Tac set for about 30 minutes.

I like to mix all different textures of fabrics....one of these flowers was a cotton gauze, one part of a upcycled golf shirt and another was some floral knit.

You can make ribbon "leaves" by twisting pieces of ribbon, secure with a pin, and add a dab of Fabri-Tac:

Once all of your flowers have had time to set, add a large amount of Fabri-Tac to the bottom of each flower but keeping about 1/4" to 1/2" away from the edge of the flower:

Place your flowers down onto a piece of felt in the shape that you prefer:

Add in your ribbon leaves between the flowers and felt before the glue has a chance to set, adding more Fabri-Tac if needed:

My favorite part? I like to "mash" all the flowers together for about a minute so that they don't look too perfectly round and so that they form into one another. With the pipe cleaners inside and the Fabri-Tac they will retain some of this "mashed" shape once you let go:

One your glue has set, carefully trim the felt around the flowers so it isn't visible when the flowers are right side up:

You can use your flowers on your pages, on your t-shirts or make a gorgeous headband!

Have a fabulous and blessed Wednesday!
For each flower you need a 20" x 2" fabric scrap. Start by putting a long bead of Fabri-Tac along the strip:
Starting at one end start rolling the fabric around the pipe cleaner. The key is not to roll to tight or too perfect....just kind of haphazardly roll your fabric up:
If you run out of fabric before you get the pipe cleaners covered just add another piece in as you go:
Once the pipe cleaner is covered with fabric, start at one end and begin rolling the flower into a spiral shape, adding in a small bead of Fabri-Tac every few inches as you go:
You'll develop your own technique for rolling as you go....I have kind of a roll, roll, then twist technique to make mine look a little fuller and shabby:
As you get to the end of your flower, tuck the "tail" under the flower with a dab of Fabri-Tac and use a small clothespin to secure. Let the Fabri-Tac set for about 30 minutes.
I like to mix all different textures of fabrics....one of these flowers was a cotton gauze, one part of a upcycled golf shirt and another was some floral knit.
You can make ribbon "leaves" by twisting pieces of ribbon, secure with a pin, and add a dab of Fabri-Tac:
Once all of your flowers have had time to set, add a large amount of Fabri-Tac to the bottom of each flower but keeping about 1/4" to 1/2" away from the edge of the flower:
Place your flowers down onto a piece of felt in the shape that you prefer:
Add in your ribbon leaves between the flowers and felt before the glue has a chance to set, adding more Fabri-Tac if needed:
My favorite part? I like to "mash" all the flowers together for about a minute so that they don't look too perfectly round and so that they form into one another. With the pipe cleaners inside and the Fabri-Tac they will retain some of this "mashed" shape once you let go:
One your glue has set, carefully trim the felt around the flowers so it isn't visible when the flowers are right side up:
You can use your flowers on your pages, on your t-shirts or make a gorgeous headband!
Have a fabulous and blessed Wednesday!
Tuesday, November 23, 2010
My classes at "A Scrap in Time" and more....
Happy Tuesday! I am so excited about my new friends at A Scrap in Time where I will be teaching these two classes on Friday, December 3. "A Scrap in Time" is located in Crestview, Florida, very close to Pensacola and to the Ft. Walton Beach area.
This is a sneak-peak of the two-page Cricut Christmas layout using "Christmas Cheer" and "Joys of the Season" Cricut Cartridges.
The class in the evening is "Tag Art with Bea". They will be making 4 tags (the 4th one is a surprise!) filled with techniques and embellishments. These tags could be hung on a Christmas tree or placed on a layout.
A Scrap in Time will also be selling this layout I designed exclusively for them as a kit. It has Teresa Collins, Basic Grey and Anna Griffin goodies. You can order them A Scrap in Time
This is one of the projects I made at Donna Downey's class last weekend at Treasured Memories in Lafayette, LA. Donna is very creative and an amazing and fun teacher!
I made this layout last Saturday while scrapping my precious and wonderful friends!!!!! I used lots of doilies and punches on this one.
Have a fabulous and blessed day!
Monday, November 22, 2010
"Tea at Elsie's" Kaisercarft Collection
Good morning! Hope you had a fabulous weekend. I cropped with my friends all day Saturday and these are some of the pages I made. I used Kaisercraft Tea at Elsie's Collection and even though this is a new color scheme for me, I love how they turned out.
I love the metal against those soft colors!
Have a blessed and fabulous Monday!
I love the metal against those soft colors!
Have a blessed and fabulous Monday!
Sunday, November 21, 2010
Paper Niche November Kit reveals....
Are you ready for this? I made an entire 12 x 12 album of 18 pages using Paper Niche's November Kit and had two papers left over!!! I was able to embellish every page as well. Here it is:
Since I did not have an album I made my own using two pieces of cardboard from a Walmart box. The pretty shape on the side with the board also comes in the kit. Here it is!
This makes a fabulous Christmas present and you do not even have to come up with ideas since this album will be at the store and you can scraplift every page, every detail in it. Make sure you stop by the store to get your November Kit as I am sure they will be sold out before Thanksgiving.
Have a beautiful and blessed day!
Subscribe to:
Comments (Atom)


